

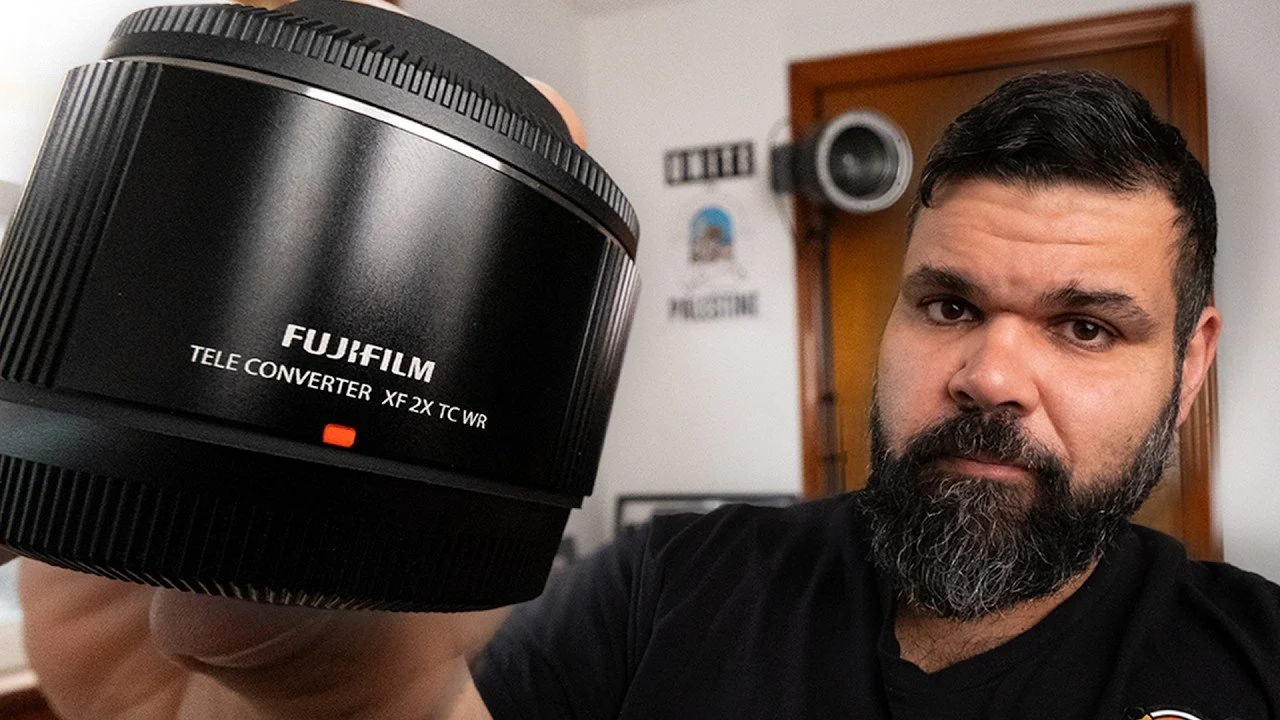
Don’t Be Afraid of 2x Teleconverters
Thinking about a Fujifilm teleconverter? See why the 2X TC on the 70–300mm is one of the best value moves in the X‑system: massive reach, minimal extra bulk, and image quality that’s more than usable for travel, wildlife, and video. Real‑world tests, comparisons with the 150–600mm, and when a 2X makes more sense than a 1.4X.
Why I Actually Recommend the Fujifilm 2X Teleconverter
I just wrapped a couple of videos on Fujifilm’s 7.10 firmware for the X‑H2S, and one question kept coming up in the comments: why do I recommend the Fujifilm 2X teleconverter so often, especially when so many people say “2X converters kill image quality”?
Short answer: because they give you a perspective you can’t get any other way without spending a lot more money on a much bigger, heavier lens. And for video especially, that trade‑off is usually worth it.
This post is a companion to the video where I take the 2X out alongside the 70–300mm and 150–600mm at sunset, shooting photos and video out by the river with the George Washington Bridge in the background. If you want to see the side‑by‑side clips and sample frames, watch the video and come back here for the breakdown.
Setting the Stage: 150–600mm vs 70–300mm
To make sense of why the 2X is so useful, it helps to compare two lenses I use a lot:
Fujifilm XF 150–600mm – big, long, and fast enough for wildlife and sports, but not exactly travel‑friendly. Around f/5.6–f/8 at the telephoto end.
Fujifilm XF 70–300mm – compact, light, and sharp. f/4–5.6 at the telephoto end, and one of my top three personal lenses.
On Fuji’s 1.5x crop sensor, those focal lengths translate to roughly:
150–600mm → 225–900mm full‑frame equivalent
70–300mm → 105–450mm full‑frame equivalent
Already a lot of reach, especially in that small 70–300mm package.
The Real Power Move: Adding the 2X Teleconverter
Here’s where it gets interesting.
When you put the Fujifilm 2X teleconverter on the 70–300mm:
It becomes a 140–600mm lens on Fuji (about 210–900mm full‑frame equivalent).
That puts it in the same effective range as the 150–600mm, but in a fraction of the size and weight.
Visually, the difference is wild. The 150–600mm is a serious piece of glass that doesn’t fit easily into most backpacks. The 70–300mm + 2X combo? Slips right in.
Yes, you lose light. A 2X converter doubles your effective f‑number, so:
f/5.6 at 300mm becomes roughly f/11 at 600mm
f/4 at 70mm becomes roughly f/8 at 140mm
That matters for low light and autofocus, but in good light—or when you’re willing to push ISO—it opens up a ton of creative options.
Image Quality: The “2X Is Bad” Myth
A lot of photographers avoid 2X teleconverters because they’ve heard the image quality hit is brutal. There is a trade‑off, no question. But two things get overlooked:
You’re buying perspective, not pixel‑perfect sharpness.
Even with some softness, you can now frame subjects you simply couldn’t reach before. Crop in further in post, and you still have compositional options you didn’t have without the TC.On the 70–300mm, the IQ drop is surprisingly small.
Compared to the 100–400mm and even the 150–600mm, the 70–300mm + 2X holds up really well. My guess? Less glass for the light to travel through, but I don’t have the optics PhD to prove it. In practice, unless you’re pixel‑peeping at 100%, the results are very usable.
For video, this is even less of an issue. Video is naturally softer than stills, you’re grading and often sharpening in post, and most viewers are watching on phones or laptops, not inspecting 100% crops.
1.4X vs 2X: When Does It Make Sense?
I also own the Fujifilm 1.4X teleconverter that comes with the 200mm f/2. That’s a special, higher‑grade version with more elements and tighter weather‑sealing specs, and it costs around $900 on its own.
In real use, though, I haven’t seen a huge image quality difference between that pro‑grade 1.4X and a standard 1.4X on the lenses I’ve tested. The 1.4X gives you:
Less reach than the 2X
Less light loss (f/4 → ~f/5.6 instead of f/8)
Generally sharper results, especially wide open
If you’re shooting high‑end sports or wildlife where every stop of light and every bit of sharpness matters, the 1.4X is a great tool. But for travel, landscapes, casual wildlife, and run‑and‑gun video, the 2X on the 70–300mm is hard to beat for the price and size.
Real‑World Testing at Sunset
In the video, I take both lenses out as the sun is dropping, shooting:
Ships on the river
Traffic on the George Washington Bridge
Distant buildings and towers through heavy air pollution
Quick video clips in F‑Log2 to test AF and usable sharpness
A few observations from that session:
Reach is transformative. At 1,800mm full‑frame equivalent (150–600mm + 2X), distant subjects suddenly feel close. Even with some IQ degradation, the perspective is something you can’t replicate by cropping alone.
Air pollution matters. A lot of the “softness” and haze you see in the frames isn’t just the teleconverter; it’s the atmosphere. On a clear day, these setups will look significantly better.
Autofocus gets picky at small apertures. Once you’re effectively at f/11–f/14 with a 2X on a telephoto, AF slows down and can struggle, especially in lower light. Subject detect still works, but it’s not magic.
Video still looks good. Even with the 2X on, the clips are perfectly usable for B‑roll, travel vlogs, and documentary work. Most viewers won’t notice the slight softness, especially after grading and uploading to YouTube.
Who Should Actually Buy a 2X Teleconverter?
A 2X teleconverter makes the most sense if:
You already own or plan to get the 70–300mm (or similar mid‑range telephoto)
You shoot a lot of travel, landscapes, or casual wildlife and want extra reach without more bulk
You do video work where perspective and framing matter more than absolute sharpness
You’re okay shooting in good light or pushing ISO when needed
It’s not the right tool if:
You need consistent f/2.8 or f/4 at long focal lengths
You’re shooting fast action in low light and rely on pinpoint AF
You’re heavily pixel‑peeping andneed the absolute best corner‑to‑corner sharpness at all times
Final Thoughts
Teleconverters—especially 2X—get a bad reputation. But they’re a classic example of a tool that’s “imperfect” on paper and incredibly powerful in practice.
With the Fujifilm 2X on the 70–300mm, you get:
Near 900mm full‑frame equivalent reach
A setup that actually fits in a normal bag
Image quality that’s more than good enough for social, web, and most client work
A whole new set of perspectives for both photos and video
If you want to see a follow‑up in cleaner air, with more controlled side‑by‑side comparisons (or even testing on a GFX body), let me know in the comments. Otherwise, this is the setup I’m reaching for more and more when I want serious reach without the serious weight.
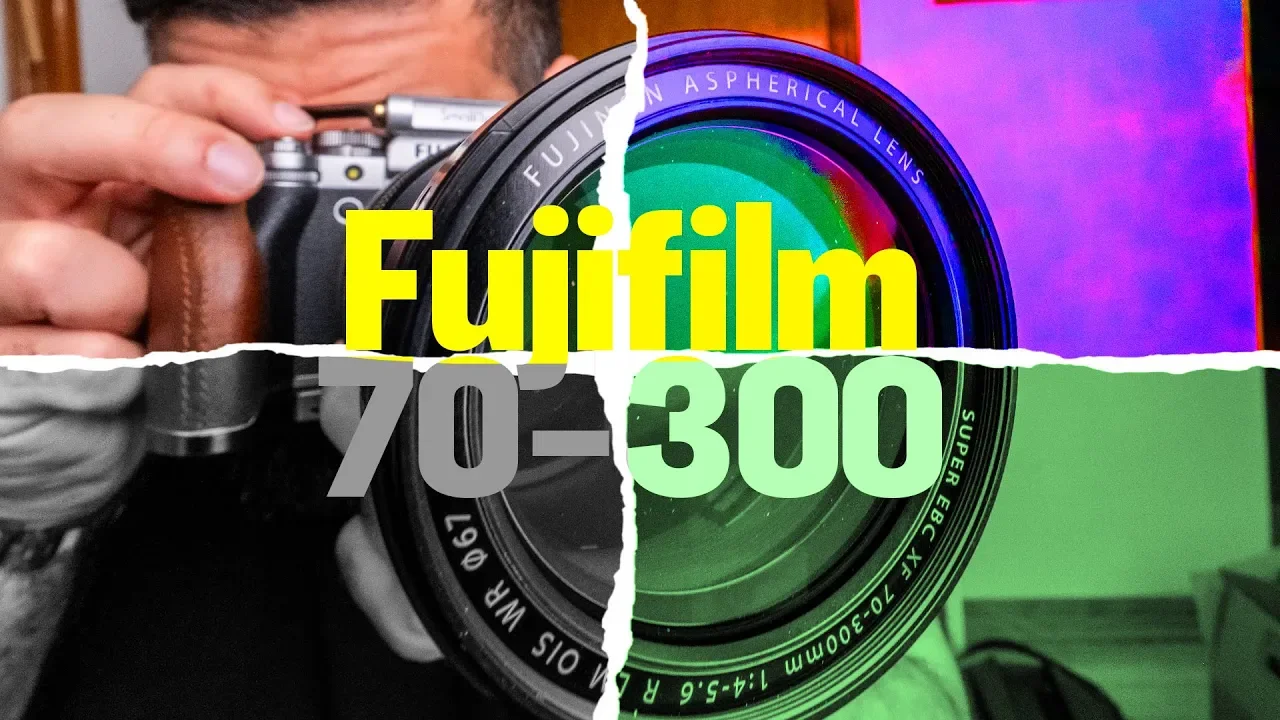
Photo Walk With The Fujifilm 70-300
Looking for a do‑it‑all telephoto for Fujifilm? See why the 70–300mm is my most‑used travel lens: real‑world reach, surprisingly strong image quality with the 2x teleconverter, and a size you’ll actually want to carry. Perfect for wildlife, landscapes, portraits, and everyday travel photography on X‑T5, X‑H2S, and other Fuji bodies.
Why the Fujifilm 70–300mm Is My Everyday Telephoto
I’ve had the Fujifilm 70–300mm for a while now, and it almost always goes with me when I travel. It’s not the flashiest lens in the lineup, but it’s the one I reach for most often when I want reach without the bulk.
On paper, it’s a straightforward zoom: 70–300mm on Fuji’s APS‑C sensor, which puts it around 105–450mm in full‑frame terms. That’s already a lot of range. Add the 2x teleconverter, and you’re looking at roughly 140–600mm on Fuji (about 210–900mm equivalent). That kind of reach in such a small package changes how you shoot.
Small Enough to Actually Carry
The first thing you notice is the size. It looks more like a standard kit lens than a serious telephoto. When you’re traveling, hiking, or just walking around a city, you want something that doesn’t scream “expensive gear” and doesn’t kill your back.
I own the 150–600mm, and while it’s impressive, it’s not an everyday lens for me. I actually sold the 100–400mm because the 70–300mm hits a better balance between size, weight, and reach for how I work.
Image Quality That Holds Up
Image quality is right there with the 100–400mm, despite the smaller size and lower price. What really surprised me is how well it handles the 2x teleconverter. On other Fuji telephotos, adding a 2x TC means an obvious hit to sharpness and contrast. On the 70–300mm, the drop is much less noticeable.
You’re still losing light—f/4 becomes effectively f/8 with the TC—so you’ll be pushing ISO in low light, especially at the long end. But for daylight travel work, landscapes, wildlife, and even casual sports, the trade‑off is worth it. You gain a ton of perspective options without lugging around a massive lens.
Real‑World Shooting: Reach, IBIS, and Autofocus
Out in the field, this lens just makes sense. At 600mm (with the TC), I’m handholding at shutter speeds that would normally worry me, and the IBIS on bodies like the X‑T5 and X‑H2S keeps things usable. You’re not going to get tack‑sharp shots at 1/60s every time, but you can get away with a lot more than you’d expect.
Autofocus is solid, though not magical. With the teleconverter on, you will notice some hunting, especially in lower light or low contrast scenes. But in good light, subject detect still locks on reliably, even at the long end. It’s not a dedicated sports lens, but it’s more than capable for casual action, wildlife, and anything that isn’t moving erratically toward you.
I’ve used it to grab tight shots of people on distant paths, compress mountain scenes, and pick out details you’d never notice with a standard zoom. That’s where this lens shines: it gives you a different way to see a scene without forcing you to plan every shot around a huge piece of glass.
Not Just for Wildlife
Most people think “telephoto” and assume wildlife or sports. This lens is great for those, but it’s also fantastic for:
Compressing cityscapes and landscapes
Isolating details in a busy scene
Portraits with serious background separation at 300mm
Travel shots where you can’t (or don’t want to) get physically closer
I’ve even ended up using the close‑focus capabilities on the telephoto end for quasi‑macro work—details on buildings, textures, moss on rooftops, things like that. It’s not a macro lens, but the ability to get tight on distant subjects and then swing around and grab something small a few feet away is handy.
Who This Lens Is For
The 70–300mm is ideal if:
You want one telephoto that covers most situations
You care more about reach and convenience than absolute maximum sharpness at every focal length
You travel or hike and don’t want to sacrifice half your bag to a lens
You already own or plan to get the Fuji 2x teleconverter
It’s not the lens for someone who needs constant f/2.8, ultra‑fast AF for pro sports, or the absolute best corner‑to‑corner performance at 600mm. But for the majority of enthusiasts and working creators who want a flexible, portable telephoto, it’s hard to beat.
Bottom Line
The 70–300mm isn’t glamorous, but it’s the lens that stays in my bag because it makes shooting easier. It’s small enough to carry everywhere, long enough to open up new compositions, and sharp enough that you won’t feel like you’re compromising—especially when you factor in how well it plays with the 2x teleconverter.
If you’re on Fuji and you’ve been on the fence about a telephoto, this is the one I’d start with.
Your Camera Company Doesn’t Love You and That’s OK
Camera companies don’t love you—they love your money. This post breaks down the marketing tactics, hype cycles, and “illusion of choice” that keep photographers endlessly upgrading. Learn how to spot the manipulation, resist FOMO, and invest in skills over gear so your next purchase is driven by real need, not corporate strategy.
Your Camera Company Doesn’t Love You: The Truth About Brand Loyalty in Photography
Whether you’re an amateur or a professional photographer, your camera is an extension of who you are. It’s how you see the world, how you capture moments, and often, how you define yourself creatively.
But behind the sleek designs and borderline toxic fan bases lies a stark reality—much like that situationship that obliterated your mental health and sense of self: your camera company doesn’t love you.
Today, we’re peeling back the layers of brand loyalty to see what’s really at stake for consumers like me and you.
Every Camera Company Is a Corp at Its Core
You need to remember this: every camera company is a corporation at its core. Their loyalty isn’t to you, the customer. It’s to their shareholders and stakeholders who demand higher revenues each quarter.
Because of that, they’ll deploy every tactic known to man to get you to buy more.
Let’s start with the emotional manipulation at play.
Camera companies use powerful marketing strategies to tap into our deepest feelings: nostalgia, aspiration, and, of course, the fear of missing out. These aren’t just campaigns. They’re calculated efforts to make you equate their products with a better version of your life—with this new piece of equipment that you’re about to watch an 8-minute YouTube video on.
They also amp up the parasocial relationships you have with your favorite content creators. A lot of them benefit as much as the camera companies do by pushing the sales link for these products. These ads—whether direct or indirect—often showcase incredible images or jaw-dropping, professionally edited videos, suggesting that these are only possible with whatever new doodad they’re trying to get you to buy.
But how often do these upgrades actually lead to the breakthroughs they promise?
The Relentless Cycle of Upgrades
The cycle of upgrades is relentless, preying on the hope that just one more purchase could make you the photographer or videographer you aspire to be.
The cost of brand loyalty is steep—both financially and emotionally. Upgrading isn’t always beneficial, but the fear of missing out on the latest technology can lead to rushed and later regrettable decisions.
The modern age of digital cameras has seen nothing but incremental updates throughout the release cycle over the past decade, especially when we’re focusing on photography. Benchmarking and testing cameras in extreme situations may showcase new features, but rarely do they reflect real-world results.
Camera communities amplify this effect, creating spaces where peer pressure and groupthink can push you toward purchases that might not suit your actual needs.
The Fujifilm X100V being perpetually sold out for the past two years—and the hype leading up to the X100VI—showcases this perfectly. Many who overpaid for one because they were sold out and “just needed to have it” found themselves wishing they didn’t pull the trigger once they realized that the 28mm focal length really wasn’t for them, or that the camera, while small, still wasn’t as pocketable as they’d hoped.
Have you ever bought a camera more because of community hype than out of necessity? It’s a common story—where passion is overshadowed by persuasion and capitalism.
The Illusion of Choice
Now let’s discuss the illusion of choice.
The market is dominated by a few major players, each purported to offer something unique. But when you strip away the branding, the differences between their products are less significant than they want you to believe.
Film simulations, picture profiles, custom looks, LUTs that can now be applied to your photos—they all kind of sound exactly the same, don’t they?
And how many Mark I and Mark II versions of the same lenses do we actually need? Faster autofocus is touted when speed was never an issue. Sharper images are promised when no one complained about sharpness before.
While it all looks good on paper and checks a few boxes to differentiate it from the previous iteration, the real-world differences are slim to none for the majority of these refreshes. That really brings into frame why so many are quick to upgrade as soon as pre-orders open up.
Gotta get some hate here, but burst rates are another great marketing tool in this space, with numbers getting to stratosphere levels—if set to very specific parameters outlined in the asterisk fine print, or with compromises in image quality being made to achieve those numbers that even the best sports photographers would be very wary of due to the amount of culling they’re going to have to do later.
Lens Ecosystems and the Trap of Exclusivity
Lens exclusivity is a tactic to keep you within their brand ecosystem, consistently spending more on lenses and accessories that are often unnecessary, expensive, and provide little to no benefit to most customers.
This exclusivity doesn’t just impact your wallet. It shapes your identity as a photographer—often more than the photos and video you produce with the products themselves.
So how do we break free from this cycle of consumer manipulation?
Breaking the Cycle: A Return to the Joy of Photography
It starts with a return to the joy of photography itself.
A lot of people come to me for advice on what camera to buy when they’re making their first purchase, and my advice is always the same: get whatever gets you to go out and shoot more.
I got into the Fujifilm ecosystem back when the X-T3 was released. What drove me to them was the value proposition of the brand. The bodies and lenses were cheaper, and since I was also a video shooter and shot a lot of sports outside of cinema cameras, they were the only manufacturer to offer 4K 60fps in their cameras at the time.
What kept me there was the shooting experience and the smaller size of their lenses, since I did a lot of on-foot travel for remote shoots.
If price is a consideration, then Fuji is typically a really easy recommendation for me to make—especially today, after they’ve sorted out their autofocus algorithms to the “set it and forget it” point where other manufacturers got to a few years back.
For others who shoot with friends, I tell them to get the same manufacturer as their friends have. That way, they have someone who can help them troubleshoot, set up their camera accordingly, and maybe borrow their lenses—as long as they aren’t the clumsy friend in the group.
Your Best Investment Isn’t Gear
Ultimately, you need to evaluate your needs critically, resist the allure of marketing, and focus on what will truly improve your work.
Your best investment is in your growth as a photographer: learning how to compose properly, how to light, how to edit, how to batch edit if you’re looking to do this as a career—and more. Not just in new gear.
Camera companies are in the business of making money. They foster brand loyalty not out of affection, but out of strategy. They don’t love you. They love the profits you bring.
So the next time you consider upgrading your gear, ask yourself:
Is this for my art?
Is it doing something for my business that my current equipment isn’t?
Or am I caught in the hype?
Be an informed consumer. Question the narrative. And let your passion for photography be guided by genuine need—not by corporate agendas.
Hey everyone, thanks for watching (or reading). Let me know in the comments if there was ever a product that didn’t live up to the hype that you ended up spending a lot of money on. Also, drop any other topics in the camera space you’d like me to cover, and I’ll catch you at the next one.
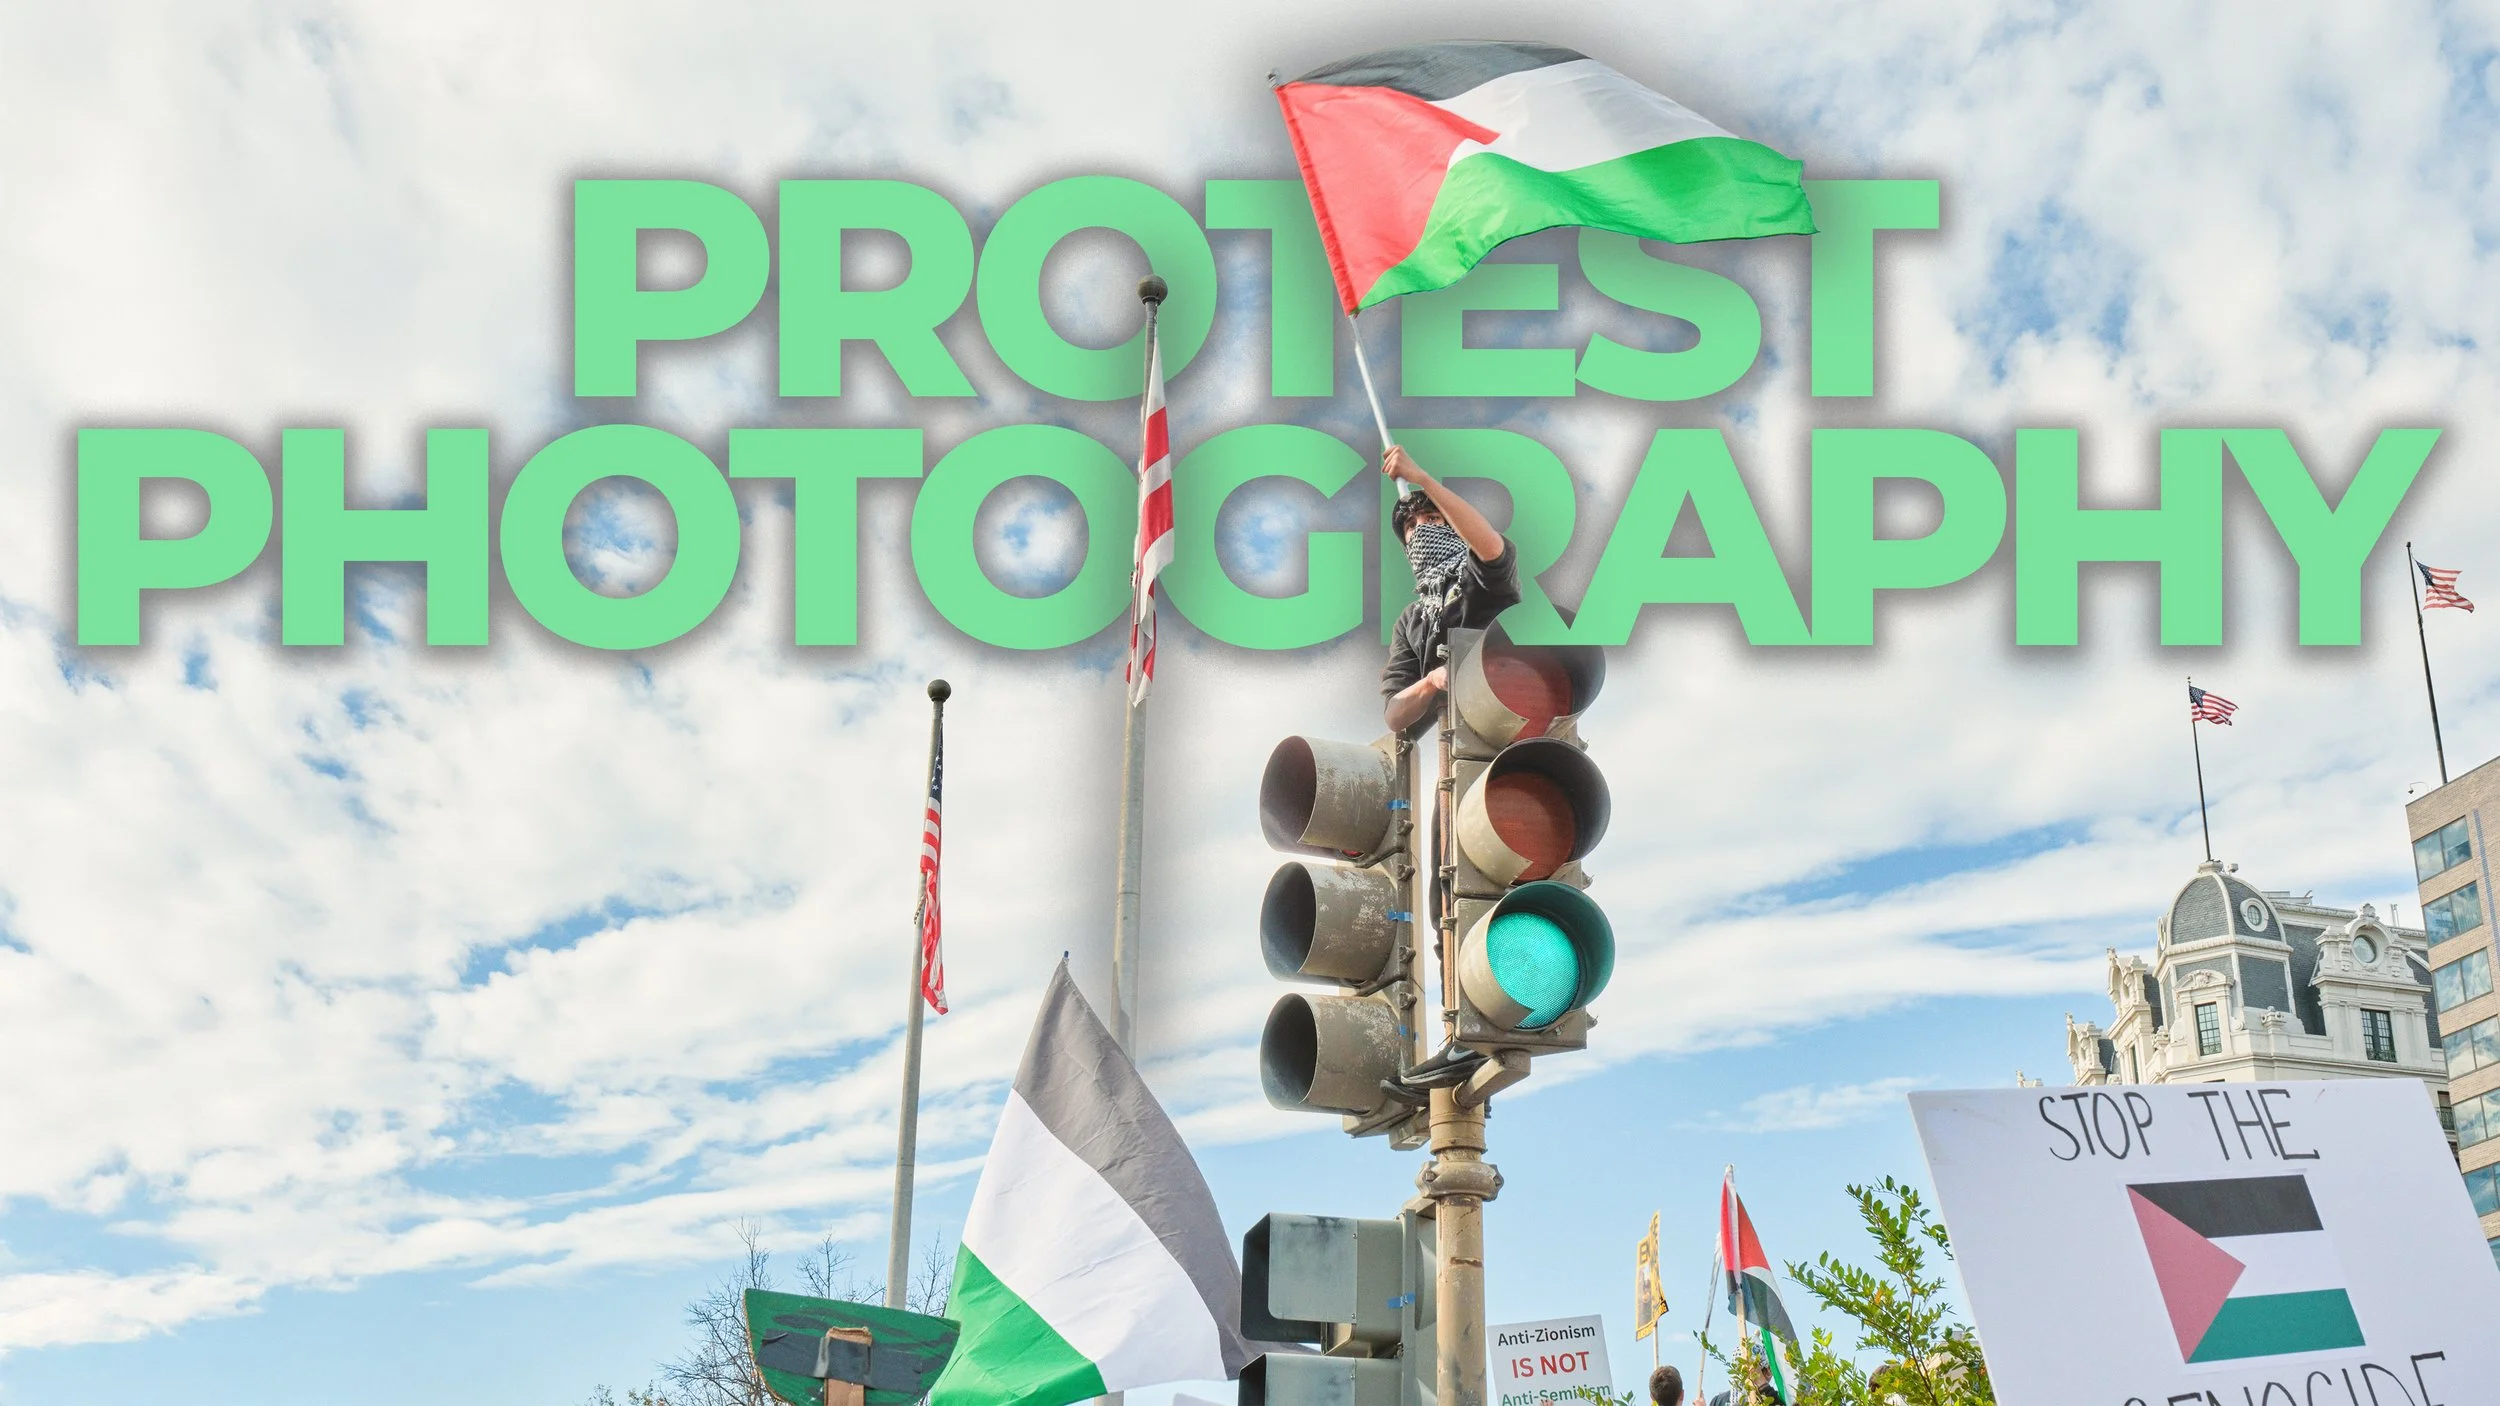
How To Shoot A Protest
Heading to a protest and want to capture powerful images without getting in the way or risking your gear? This guide breaks down the simple, practical setup I use at every rally—plus the key techniques for shooting while moving, staying safe, and respecting the crowd. Whether you’re new to documentary work or just want to document your next march with confidence, these tips will help you come away with stronger photos and fewer headaches.
How to Shoot a Protest: Gear, Technique, and Staying Safe
Today’s not only going to be a lesson in how to shoot a protest—it’s also going to be a test of how good the wind muff is on this microphone. We’re going to find that out together. And exposure? Not my friend today. That’s what happens when you decide to shoot during midday sun.
For today’s episode, I’m giving you three pieces of advice on how to take photos during a protest.
I genuinely can’t believe it’s been over a year at this point, but I’ve been protesting the ongoing genocide in Palestine being carried out by the Zionist state of Israel and the United States government. At this point, I don’t think there are any secrets there.
This leads me into my first point: make sure you are on the right side of history. If you’re going to attend a protest, make sure it’s against killing civilians, flattening a land, and further expanding a colonial state. Killing children, women, and, believe it or not, men too? That’s bad. Never mind the whole “let’s annex the West Bank and Gaza” thing—I can go into a separate video on that.
Along with what’s happening in Sudan, Congo, and all of it being carried out by the same group of people—and, of course, “orange man bad,” he’s in office now too—I’m anticipating a lot of protests in the next couple of years in the United States. Here’s a guide for you. And if you’re on the wrong side of history, this is still a good video for you to watch. When they put your photos alongside Nazi Germany photos for comparisons in the future, I think you just want people to comment on your lack of morality—not make fun of your photos.
With that being said, let’s get into it.
1. Keep Your Gear Simple and Practical
Protest photography—I don’t really know if that’s a genre or not, because I feel like it falls under documentary. But a big question people have when they want to go to a protest that means a lot to them is: what kind of equipment do I bring?
I’ve seen people bring film cameras, which I thought was a very interesting choice. But sure enough, those photos still capture the emotion and the environment. So if you’ve got deep pockets and you like developing film, that could work for you.
When people ask me, I always tell them to go with a very simple setup:
One camera
One lens
A shutter of some type
A monopod
The reason for this is that you want to be as practical as possible while you’re on the move.
If you’ve got it, I always recommend going with a 24–70mm. You get a relatively wide lens along with a medium telephoto in case you want to isolate anybody—via a speaker, via someone with a very clever sign, whatever the case is. The 24–70mm is typically the most boring lens in any camera ecosystem because it’s the most versatile and doesn’t really stand out in anything, but it also does everything very well.
My camera of choice is typically either the Fujifilm X-T5 or the X-H2S when I go out, because they’re the smallest cameras I own. But if you have something even smaller—like a Ricoh GR III, a Sony RX100, or any small camera—I’d recommend taking that. Not only does it reduce fatigue, especially if it’s going to be a longer day, but it’s easy to just kind of stash your gear and be on your way just in case you ever have to part ways if you’re going to be staying later.
Maybe a small, fast prime is okay to keep in your bag or your pocket if you have access to one. But the reason I typically recommend having just one lens is because you don’t want to be the person who’s holding up anyone behind you because you’re busy switching out a lens just to get a very specific shot.
People get a little weird. That weirdness that we have where we have to bring all our gear to a place to take photos—sometimes carrying that into an environment where something being knocked out or shooting at the lowest ISO really isn’t the factor—is still a habit that’s ingrained. This is a pretty good environment to start breaking those habits in, in addition to documenting everything going on around you.
2. Use a Cheap Monopod (and a Remote Shutter)
The second thing I want to bring up is a monopod. This monopod is a cheap one I’ve had for seven, eight, nine years—something along those lines. It’s an Amazon Basics monopod.
There are two reasons why I want you to go with a cheap monopod:
If it breaks or it gets lost, no big loss.
It’s small, very light, weighs almost nothing. There are no fancy feet, no fancy fluid head up top.
All you do is screw it into your cage if you’ve got one, or directly into the camera if you don’t. There is no failure point between this monopod and your camera body for anything to accidentally slide off and potentially bop someone in the head—bop you in the head, break. No one wants to break their expensive camera.
If you find yourself in the middle of a situation, the last thing you want to do is look up while you have to pay attention in front of you and potentially have someone knock it out of your hands. Maybe that Arca-Swiss mount got a little loose while you were walking the entire day, and suddenly your camera flips over to the side and falls down. No good.
The most minimal setup is the best setup that you can possibly have.
Now you might ask: why a monopod? It’s really just for one reason.
Typically, when you’re taking photos at a protest you’re attending, you’re going to be at the same eye level as everyone else. I’m 5'8" on a good day. When I have a monopod, here’s where my vantage point is—and that’s where a lot of my shots are. I’m not even sure if it’s completely in frame, and that’s how I take a lot of my photos and videos when I’m at these events.
It shows how many people are present, and it gives you kind of a bird’s-eye view—especially in places where drones aren’t allowed. And I definitely don’t recommend flying a drone at a protest, for those wondering.
This piece up top here is a remote shutter. This, while not a necessity, just makes your life a lot easier. This one’s a wireless one—I’ve had it for six or seven years, the Aputure Pebble. It’s got a little Bluetooth or radio remote.
Pretty much, I’m walking around like this for any event that I’m covering. The reason I say remote shutter: for obvious reasons, but just to mention it—when you put it up in the air, you can just take shots, fire off shots, no problem.
Otherwise, what you have to do—and I have done it in the past, and you do get quite a shoulder workout after a while—is you’re going to set the two-second timer on your camera, bring it down, press it, lift it back up, take the shot, bring it back down, press it, take it back up, and so on. It fatigues you after a while.
Of course, you can use a cable shutter if you do. If you do, I recommend taping it somewhere that you can reach, or at least taping a portion of the wire. But the reason I like the wireless is that there’s no potential for the release to actually start swinging around the monopod, or again bop someone in the head accidentally, or potentially get caught in a railing as you’re marching down the street.
I typically go with a backpack or a hoodie, so I’ll always keep the 16mm or 18mm f/1.4 prime with me if I know it’s going to be a late day, just to keep the grain down a little bit. But I’ve taken photos with this thing pumped up to ISO 5,000–8,000 with absolutely no problems—and that’s not even applying modern-day denoising tools.
If you’ve got an older camera like the Canon 5D Classic that I did a video on a few weeks ago, it’s going to be a little difficult, so you are going to have to consider the aperture when things start going dark. But if you have a more modern camera—something released in the last five or six years—I think you’re going to be okay. If I had my Fujifilm X-T3, I’m pretty sure I would have taken the exact same photos with the exact same image quality with no issues whatsoever.
3. Learn to Shoot While Moving (and Don’t Block the March)
So you’ve got the gear. This is how you’re supposed to conduct yourself and shoot while you’re in the protest.
If everyone is standing still, you can go ahead and take your angles, take your time, set your shutter speed, play with your ISO, and you’re good to go.
One of the biggest issues is that when people are actually marching, people will literally go and then stop to take a photo while the world behind them is still moving forward. Don’t be that person.
You’re going to have to learn how to shoot while you’re actively walking. When you’re actually shooting while moving, it doesn’t really make a huge difference, because the camera’s going to be moving along with all of your subjects.
Get comfortable with pumping up that ISO as need be, and get comfortable with shooting at faster shutter speeds.
For most processions, I recommend everyone just keep their shutter speed at 1/250th of a second. If you’re in places that have a lot of shadows from buildings or something, you can actually just put your camera in shutter priority mode and not worry about anything else.
What that means, for anyone not accustomed to it, is that you lock your shutter speed at 1/250th to tell your camera: “No matter what, this is what I want the shutter speed to be.” It’ll adjust exposure using the aperture and ISO on its own.
Personally, I keep everything manual, or I’ll only have auto ISO enabled. I’m not really looking for a shallow depth of field when I have this up in the air, so I’ll typically keep aperture anywhere from f/8 to f/11 to have a really sharp photo, and shutter speed at minimum will be 1/250th of a second.
Auto ISO—most cameras nowadays have pretty decent auto ISO. Keep it in RAW so you can adjust exposure in case the auto ISO ends up giving you a weird reading and overexposing your image.
Those are my two big pieces of advice.
With the X-T3 or X-T5’s tilty screen down, it’s super helpful—really helpful—to see what you’re shooting, keeping in mind I’ve got the remote shutter attached. Here’s the remote right here. I’ll have this in my hand, this in the air as I’m walking, checking my level, checking my framing, and taking shots, no problem.
Also, this is another benefit of having a monopod: you can just turn it around, tilt it down a bit, take some more shots. That way, you’re not just capturing the back of people’s heads. Those are pretty unique perspectives, because normally you’ll only see those shots of people’s faces from the sidelines—news reporters or local enthusiasts that’ll just take shots of every protest that happens in their town. But just seeing so many people, and all the diversity in the background—if you’re at the right rally, that is, in the crowd—it really is an incredible shot to capture.
This goes without saying, but for courtesy’s sake: if someone’s covering their face, do not identify them. If they take off their mask to eat or something, you don’t take that shot. Otherwise, if it’s like me—I show up, nothing on my face—I don’t care if you take my shot. That’s like the general consensus.
Also, I really can’t stress this point enough: do not stop while the march is going. If you do want to stop and take a shot, same rules apply: go to the outer edges. Typically, they’re a lot slower. That’s where you’ll have a lot of media taking photos—that’s kind of like the rest area for everyone, if you will. You’ll find areas that are like rest stops for everybody throughout the routes.
This is how I shoot every rally that I attend, either photo or video.
Some advice if you’re soloing this and you’re doing video and you’re going to be interviewing people: something like a DJI mic, something simple that you can pop on and pop off for people—that’s really going to be the way to go. Shotgun mics, unless you’re standing this close, no matter how directional they are, are going to pick up a lot of ambient noise. Typically at a rally, there is a lot of ambient noise. The less processing you have to do in post to save audio, the better, because the tools still aren’t quite as refined as they are for all the visual stuff nowadays.
Decorum and Safety: What to Do If Things Go South
Last thing I want to touch on is decorum in case anything goes south.
First: try not to accidentally bonk anyone with this. I know it looks like Thor’s hammer with a camera attached, but this is a pricey hammer. Don’t do that.
Second: if you do manage to capture an altercation and some authority figure comes in and says, “Did you take a photo of this person? Can I see your camera?” the answer is always going to be no.
There are a lot of people that show up to rallies that have some very specific agendas from opposing sides, and these are the last people that you ever want to lend a hand to.
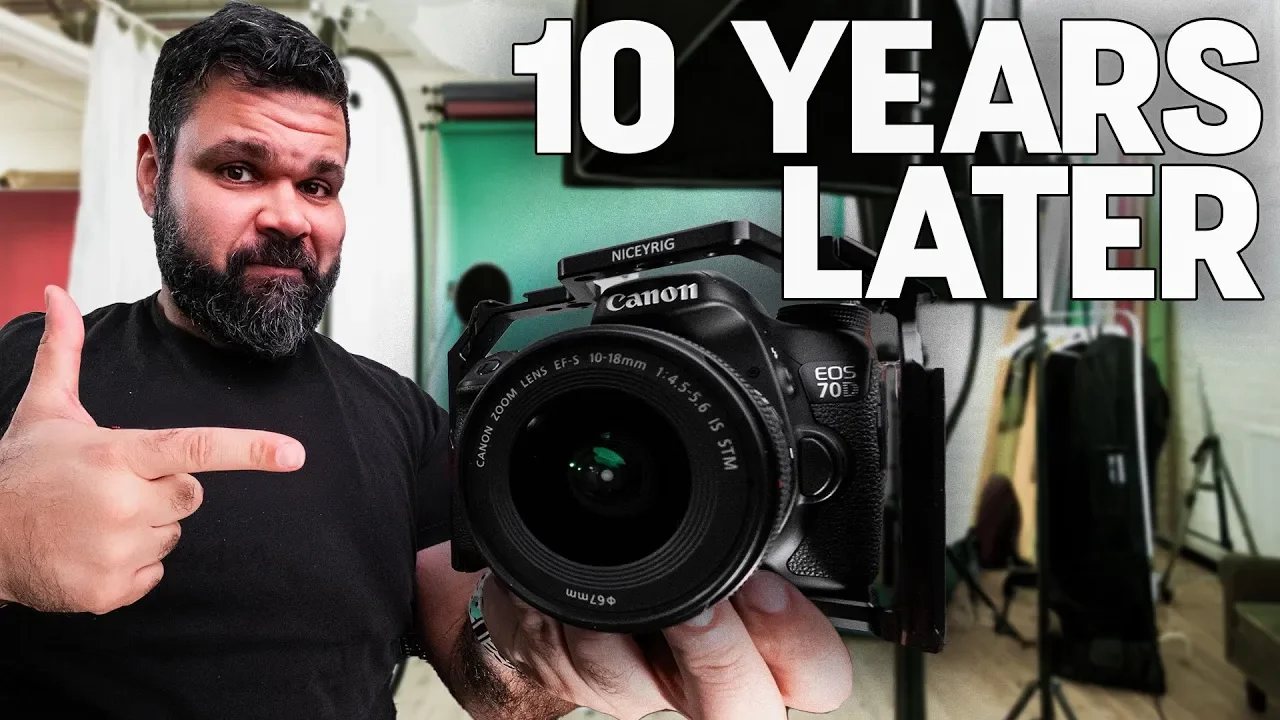
3652 Days With The Canon 70D
Ten years later, I still think I got really lucky that the Canon 70D is the camera I chose back in the day. I wasn’t the tech guy I am now. The learning curve was astronomically high—shooting in Auto, let alone Manual, felt like learning a new language. If I didn’t have a camera that could at least focus properly on its own, I’m not sure I would’ve stuck with this as a career. And considering how much of my personality this is now—hobby, career, passion—it’s wild to think I might’ve ended up a completely different person.
I’m convinced nobody becomes a photographer or videographer on purpose. That’s my story, and it matches a lot of other people I know.
Why the 70D Mattered (Even If I Didn’t Know It at the Time)
I initially bought the 70D to take photos of me and my friends at strongman competitions and at CrossFit-style events. I tried my hand at YouTube videos pretty quickly, but it didn’t take long to realize I was, in fact, just very boring on camera. So I stuck mostly to photos back then.
Then something shifted at work. I ended up shooting the first set of videos for a card game called What Do You Meme? for the company through a collaboration with Distractify, where I was working at the time. I shot all of that with this camera.
I also captured stuff I didn’t realize would become great archival footage for anyone who followed strongman. I shot a clip of Evan Singleton at his first competition, North Carolina’s Strongest Man, which got him an invite to Giants Live. Now he’s a regular at World’s Strongest Man, the Arnold, and Giants Live events around the world. All of that was shot on the Canon 70D.
This particular body has seen serious use. It’s rough. But it’s still here.
The Lens That Did Most of the Heavy Lifting
For years, my go-to lens was the Canon EF-S 10–18mm. Funny enough, I just reviewed the Sigma 10–18mm for Fujifilm, which is a more modern take on that same idea. Back then, the 10–18 was my all-around lens for shooting indoors. I didn’t know what lighting was. I didn’t know what shutter speed was. I barely knew what I was doing.
Most of my actual education around frame rates, codecs, and color came later with the Fujifilm X-T3. But the 70D? That was the boot camp.
The 70D is a prosumer, crop-sensor DSLR. Crop vs full-frame wasn’t as big of a deal back then as it is now, with everyone freaking out over sensor sizes. It’s got a fully articulating “flippy” screen, which made it great for content creators even before that was a thing.
The big deal with this camera, though, is that it was the one Canon used to debut Dual Pixel Autofocus. That really kicked off the modern age of “good autofocus” in stills/video hybrids. Over 10 years later, it’s still really good.
If you’re doing talking-head videos at your desk, a 70D is still a very viable option. Yes, it only shoots 1080p. But most people don’t actually need more, and once you upload to YouTube, everything gets compressed and denoised anyway. The difference between 1080p and 4K is often smaller than you think on social platforms.
1080p in a 4K World: Still Worth It?
Out of curiosity, I upscaled some of this 1080p footage to 4K using Topaz Video AI, the same tool I use when clients send me low-res files to edit. In a split-screen test, the difference is… fine. Not night and day. Maybe a bit more detail in the background if you really look for it, but nothing that screams “you need 4K or you’re doomed.”
For photos, I could’ve easily shot with this camera for another two years before switching. Outside of heavy cropping, the image quality isn’t that different from a lot of newer bodies for social media use.
I recently moved up to New Jersey and linked up with a local creative group. I originally planned to make this video months ago, but between moving and getting settled, I just didn’t have the bandwidth. Now that I’m picking it back up, I realized I hadn’t used the camera in so long that it had reset to factory settings. I didn’t even shoot in RAW for the test photos—everything you’ll see from this session is JPEG.
And honestly? The JPEGs look pretty good. Keep in mind, the 70D’s JPEG engine is not amazing. If these still look decent, that says something.
Autofocus That Still Holds Its Own
Image quality for social is one thing, but the 70D’s real superpower is autofocus. Instagram and TikTok top out around 3 megapixels for full vertical images, so megapixel count isn’t the bottleneck. The autofocus on this thing is still really, really good.
This was the first camera with Dual Pixel AF, and it’s still better than some modern cameras. It’s only recently that Panasonic caught up to this level. Fujifilm has great AF for stills, but continuous video autofocus—especially for talking heads—is still, in my experience, a step behind what this old DSLR does. The X-H2S is an exception, but that’s a flagship.
We’re talking about a camera that’s roughly 12 years old, considerably cheaper than anything today, holding its own against current flagships for video autofocus. That’s nuts.
Auto ISO on the 70D is also better than most modern cameras—certainly better than Fujifilm’s, and honestly, in some situations, even better than what I see on the Canon R5 C. I’m not usually an Auto ISO guy, but driving in the car with constantly changing light, I decided to let it do its thing. I’m willing to bet it handled those shifts pretty well. I do have an ND filter on to keep my shutter near 180 degrees; I’d rather have smooth motion than slightly better exposure with choppy movement.
Glass Matters More Than the Body
To prove a point, I swapped lenses a few times during this test.
First, the Canon EF-S 10–24mm: cheap, inexpensive, easy to find used on Marketplace for around $100–$125, especially with the hood. It’s a fine wide-angle, but then I switched to the Canon EF 35mm f/1.4 Mark II.
With the 35mm f/1.4, you immediately see better image quality, more separation, nicer background roll-off. That lens alone sells the point: if you’re doing long talking-head videos—30 minutes at a time, which is around the 70D’s recording limit thanks to that old EU tax-related cutoff—you can get a very pleasing image with the right glass.
The 35mm f/1.4 Mark II is still a lens I use on the R5 C for interviews and documentaries. It’s EF mount, no image stabilization, but on a 1.6x crop body like the 70D, it behaves like roughly a 55mm. Great for controlled talking-head work.
Yes, the wind is brutal in some of these handheld tests, and the audio will need cleanup, but the image with that premium glass on this old sensor still looks solid. And you can find that lens used for around $800–$1,000, which is a lot more attainable than building an equivalent modern kit.
One of the big criticisms of the 70D back in the day was that the way the Dual Pixel AF pixels were arranged made the image “soft.” I never really noticed that problem until years later. And for video, a slightly softer image is often preferable anyway. I still shoot most of my personal talking heads with a 1/8 Pro Mist filter on, because I like the look. Too many light sources in commercial work can get messy, but that’s a whole other conversation.
Testing the AF With a “Big Chungus” Lens
Then I did something a little more fun: I brought out one of my all-time favorite lenses, the Sigma 120–300mm f/2.8. This was the most expensive purchase I made while still in the Canon ecosystem before moving to Fujifilm. It’s a beast—easily five or six pounds, with not-great weight distribution. But for sports, it’s phenomenal.
On its own, this lens used to be around $10,000. I got it on sale for about $8,000 back then. Now you can sometimes find it used for around $2,500, which is insane for what you get. It’s still a hell of a lot more affordable than something like the Canon RF 100–300mm f/2.8.
I mounted this on the 70D and took it for a walk to test what kind of stills and video it could produce on this old sensor. Rolling shutter on the 70D is not great, which is fine for photos but very noticeable for video. Even with the lens’s IS on and the camera on a tripod (not a video head, but still), any fast movement turns into jelly. But for static shots and slow pans, the images are solid.
Obviously, you’re stuck at 1080p, 8-bit, with whatever color profile you choose in-camera. There’s no real Log, just a flat profile that falls apart if you push it too hard. Highlights and shadows don’t have a ton of latitude. And there’s no EVF, which makes fighting the sun to expose properly a bit of a workout.
But again: we’re talking about a camera you can find nowadays for around $150. Maybe I should just shut up and appreciate what this thing still does.
Is the 70D Still Recommendable in 2026?
So, 10 years later: would I recommend the Canon 70D?
For photos: absolutely. It’s still a great stills camera.
For social video or personal video like this: very usable.
For podcasts or long-form recording: not ideal. The 30-minute recording limit is a hard stop, and there’s no clean HDMI out. You’ll get all the camera stats overlaid on your external recorder, which is a dealbreaker if you need that.
But for most people—especially those who still use cameras like the T6i and similar—this is a pretty good option. Compared to its closest modern equivalent, the Canon R50, I’d still recommend the 70D. Why? Because the EF/EF-S lens ecosystem is mature, affordable, and full of high-quality glass. The RF system, until very recently, didn’t even have third-party lenses, and even now, those are mostly limited to RF-S crop options.
You can find a 70D in really good condition on Marketplace, Craigslist, or eBay for under $200. They hold up. And you’ve got a much better shot at finding cheap, high-end glass like the 35mm f/1.4 Mark II to pair with it.
To put together a package like this on a modern system—body, fast prime, zoom, NDs, etc.—you’re easily looking at $2,500–$3,000. This entire setup? Probably $800–$900 if you hunt around.
The Fun Factor (And Why It Still Matters)
I feel genuinely nostalgic shooting on this thing. I didn’t have this skill set back then, and now that I do, I’ve started appreciating older bodies more. Yes, your average phone is shooting higher resolution images. Yes, there are great lens attachments for phones. And yes, your phone is the camera that’s always with you.
But you’re not going to get this look out of an iPhone. The depth, the background separation, the way the 35mm f/1.4 renders a scene—phones can’t touch that. And you get a fully articulating screen, which most phones still don’t offer in any meaningful way.
And I know it’s frowned upon to say this nowadays, but: shooting on this thing is fun. Shooting on any real camera is fun. It’s a lot more fun than using a phone, no matter how convenient the phone is.
I’d love to drop affiliate links for this in the description, but you’re not going to find the 70D new on Amazon anymore. The 80D is essentially the same camera, with the added benefit of 1080p60. The 90D is basically the M50 in a DSLR body: better 1080p AF, but horrible 4K that doesn’t even use Dual Pixel AF—just contrast-based hunting. Don’t do it. Trust me.
Final Thoughts
This was a fun, nostalgic video for me. The 70D played a huge role in getting me into this world, and it’s still capable enough that I don’t feel embarrassed using it alongside modern gear.

Fujifilm Gets The Sigma 10-18mm F2.8
The Sigma 10-18mm F2.8 for the Fujifilm X-Mount.
I review what’s now my favorite YouTube video lens, the Sigma 10-18mm F2.8 for the Fujifilm X-Mount.

Shoot Video For A Living
Ever wanted to become a video professional? Here’s how I got started and if I can do it, you can too.
I get a lot of questions from up and coming video enthusiats on how to turn their hobby into a profession. The beauty of working in the creative field is that there is no linear path, but these tips are almost universal for anyone looking to turn their side gig into something a little more sustainable.

Reviewing All of My Fujifilm Gear
Discover a comprehensive review of Fujifilm cameras and lenses, including the XT3, XT5, and XH2S bodies, along with popular lenses like the 16mm F1.4 and 50mm F1.0. Learn about the strengths and weaknesses of each piece of equipment, from image quality and autofocus performance to video capabilities. Get insights on adapting third-party lenses and tips for both professional and enthusiast photographers using the Fujifilm X system.
Camera Bodies
Fujifilm XT3
Rating: 9/10
Pros: First hybrid camera with 4K 60fps, great image quality, good autofocus after Kaizen update
Cons: Battery life, 30-minute record limit, overheating issues in extreme conditions
Still highly recommended, especially for its current value
Fujifilm XT5
Rating: 9/10 (8.5/10 due to supply issues)
Pros: 40MP sensor, improved IBIS, better video capabilities (6.2K), good autofocus
Cons: No battery grip option, supply chain issues
Fujifilm XH2S
Rating: 7/10 (potential for 9.5/10 if issues are resolved)
Pros: Open gate recording, great ergonomics, good autofocus (when working correctly)
Cons: Recent firmware updates have caused autofocus issues, external cooling fan design is awkward
Lenses
Fujifilm 16mm F1.4 WR
Pros: Great image quality, weather-resistant
Cons: Loud autofocus for video
Fujifilm 18mm F1.4
Pros: Fast autofocus, great image quality, quiet for video
Fujifilm 33mm F1.4
Pros: Quiet autofocus, great for video and portraits
Fujifilm 50mm F1.0
Pros: Unique F1.0 aperture, excellent for portraits
Cons: Some chromatic aberration in high contrast scenes
Fujifilm 16-80mm F4
Pros: Versatile range, excellent image stabilization, weather-sealed
Fujifilm 10-24mm F4 WR
Pros: Weather-sealed, great for wide-angle shots and video
Fujifilm 16-55mm F2.8
Pros: Excellent image quality, versatile range, weather-sealed
Cons: Considered "boring" due to F2.8 aperture
Fujifilm 70-300mm
Pros: Excellent image quality, works well with teleconverters
Fujifilm 150-600mm
Pros: Lightweight, good image quality in good light
Cons: Slow aperture at telephoto end (F8)
Fujifilm 200mm F2
Pros: Exceptional image quality, great for sports and portraits
Cons: Very expensive, large and heavy
Adapters and Third-Party Lenses
Discussed options for adapting Canon FD and EF lenses to Fujifilm bodies
Mentioned Viltrox, Fringer, and Metabones adapters for various lens systems
Additional Notes
The reviewer has an emotional attachment to the Fujifilm brand due to its role in their professional development
Emphasized the importance of firmware updates and potential issues they can cause
Discussed the value of buying used equipment when possible
Highlighted the strengths of Fujifilm's APS-C system and lens lineup
This comprehensive review provides insights into a wide range of Fujifilm equipment, covering both the strengths and weaknesses of various cameras and lenses. The reviewer's experience with using this equipment professionally adds valuable context to the assessments.

The Pitfalls of Gig Economy Photography Platforms: Why They're Bad for Photographers
Discover why gig economy photography platforms are harmful to photographers. Learn about the low pay, high equipment costs, and unrealistic expectations set by companies like Snapper and Shoot. Understand the risks of burnout, undervaluation, and stunted professional growth. Find out why these platforms lead to customer dissatisfaction and how they hinder photographers from building sustainable careers. Explore better alternatives for aspiring photographers to build their portfolios and client base.
# The Pitfalls of Gig Economy Photography Platforms: Why They're Bad for Photographers
In this video, Omar discusses the problems with gig economy photography platforms like Snapper, Shoot, and others. He explains why these platforms are detrimental to both aspiring and professional photographers.
## Key Points:
1. **Low Compensation**:
- Platforms typically offer $35-$70 per hour for active shooting time.
- No compensation for travel time, editing, or equipment costs.
- Photographers are treated as independent contractors, responsible for their own taxes.
2. **High Requirements, Low Pay**:
- Platforms demand professional-grade equipment (full-frame cameras, weather-sealed gear).
- Photographers must have advanced skills in shooting, directing, and editing.
- The pay doesn't justify the investment in equipment and skills.
3. **Financial Burden**:
- Photographers need to invest $2,000-$4,000 in equipment to meet platform requirements.
- It can take 58-114 shoots just to pay off the initial equipment investment.
4. **Lack of Job Security and Benefits**:
- Inconsistent income and work availability.
- No employee benefits despite being treated like employees.
5. **Undervaluation of Work**:
- The platforms undervalue the skills and effort required for quality photography.
- Photographers are expected to handle all aspects of the job for minimal compensation.
6. **Burnout and Overwork**:
- The combination of low pay and high expectations leads to burnout.
- Photographers often work long hours for minimal compensation.
7. **Limited Professional Growth**:
- No opportunity to build a portfolio (can't use photos for self-promotion).
- Limited creative control and inability to plan shoots in advance.
8. **Dependence on Platforms**:
- Photographers become reliant on these platforms for work.
- They don't learn essential marketing and business skills.
9. **Customer Dissatisfaction**:
- Reddit testimonials show frequent cancellations and poor customer service.
- The low pay leads to photographers prioritizing other, better-paying gigs.
## Alternatives and Advice:
1. Reach out to personal networks for initial clients.
2. Offer affordable rates ($250+) to build a portfolio and client base.
3. Focus on building relationships and getting referrals.
4. Learn to market yourself and grow professionally.
Omar emphasizes that these platforms are detrimental to both individual photographers and the industry as a whole. He encourages photographers to avoid these platforms and instead focus on building their skills, portfolio, and client base independently.

Is the Canon 5D Classic Still Good?
The Canon 5D Classic offers a cost-effective way to achieve high-quality photos, especially for those who don't need the latest features. It's particularly suitable for deliberate, thoughtful photography in good lighting conditions. However, users should be aware of its limitations, especially in low-light situations.
# Canon 5D Classic Review: Is a 19-Year-Old Camera Still Relevant?
In this video, I explore the capabilities of the Canon 5D Classic, a 19-year-old digital camera, and discuss its relevance in today's photography landscape. Here's a breakdown of the key points:
## The Appeal of Older Cameras
1. There's a resurgence in using actual cameras over phones for better quality photos.
2. Many people are rediscovering the value of older, professional-grade cameras for personal photography.
3. The Canon 5D Classic, released 19 years ago, still offers professional features at an affordable price.
## Technical Specifications and Performance
1. 12.8 megapixel full-frame sensor
2. Optical viewfinder (no EVF or live view)
3. No video capabilities
4. Limited to 9 autofocus points
5. ISO performance good up to 800, usable up to 1250, poor beyond 1600
## Advantages
1. Excellent image quality for most purposes
2. Compatible with affordable Canon EF lenses
3. Comfortable ergonomics and weather-sealed body
4. "Digital film camera" experience
5. Produces a "filmic" look due to its 10-stop dynamic range
## Cost-Effectiveness
1. Body, battery grip, and accessories can be found for under $200
2. High-quality EF lenses available at reasonable prices
3. Total setup cost significantly lower than many modern cameras
## Practical Use
1. Ideal for personal photography and memory capture
2. Performs well in good lighting conditions
3. Circular polarizer recommended for creative opportunities
## Limitations
1. Poor low-light performance (ISO 1600 and above)
2. No continuous autofocus
3. Limited dynamic range compared to modern cameras
## Post-Processing
1. Modern denoising tools can significantly improve high-ISO images
2. Lightroom and Topaz Photo AI demonstrated as effective tools
## Conclusion
The Canon 5D Classic offers a cost-effective way to achieve high-quality photos, especially for those who don't need the latest features. It's particularly suitable for deliberate, thoughtful photography in good lighting conditions. However, users should be aware of its limitations, especially in low-light situations.

How To Turn Any Lens Into An Ultrawide Lens
Learn how to create wide-angle photos with any lens using panoramic stitching. This video demonstrates the technique using a Palestinian mural in Washington DC as an example. Discover the equipment needed, shooting tips, and post-processing steps to overcome space limitations and capture impossible shots. Perfect for photographers looking to expand their creative possibilities without investing in expensive ultra-wide lenses. Master this method to solve common shooting challenges.
# How to Turn Any Lens into a Wide-Angle Lens: A Practical Guide
In this video, I demonstrate a technique to create wide-angle photos using any lens you have on hand. This method is particularly useful when faced with challenging shooting conditions, such as narrow spaces that prevent you from capturing an entire scene in one frame.
## Key Points:
1. **The Challenge**: I showcase this technique using a Palestinian mural in Washington DC as an example. The narrow alleyway (8-10 feet wide) made it impossible to capture the entire mural in one shot, even with an ultra-wide lens.
2. **The Solution**: Panoramic stitching. By taking multiple overlapping vertical shots and combining them in post-processing, you can create a wide-angle view that wouldn't be possible with a single shot.
3. **Equipment Used**:
- Fujifilm XT5 camera
- Fuji 10-24mm lens (15mm full-frame equivalent at its widest)
- Monopod
- Wireless trigger
4. **Technique**:
- Mount the camera vertically on a monopod
- Use manual focus and set aperture to f/9 for sharpness
- Take multiple overlapping shots (40-70% overlap recommended)
- Maintain level shots to minimize distortion
5. **Post-Processing**:
- Use software like Capture One or Lightroom for stitching
- Correct perspective and distortion in Photoshop
- Optional: sky replacement and other creative edits
6. **Applications**: This technique can be used with various cameras, including smartphones and point-and-shoots. It allows you to create ultra-wide shots or even simulate medium format looks with smaller sensors.
7. **Creative Possibilities**: The final image doesn't have to be perfectly corrected. In this case, I chose to keep some distortion for artistic effect.
8. **Practical Use**: The resulting high-resolution image was printed and shared with the mural artists.
This technique demonstrates that creativity in photography often comes down to problem-solving within constraints. By mastering this method, you can overcome limitations in your gear and shooting conditions to capture scenes that would otherwise be impossible.

How to Get Smooth Handheld Footage: Top 5 Techniques for Beginners
In this post, I share my tips for shooting handheld video using a 50mm lens, offering practical techniques for stabilization without gimbals or expensive gear. From using your body as a stabilizer, leveraging camera straps, to applying post-production techniques like warp stabilizer, these tips will help you achieve smoother, professional-looking footage with minimal equipment.
Hey everyone, Omar here! Today's post is inspired by a DM from a subscriber named Soale from Bistan, asking about shooting handheld video with a 50mm lens. His camera broke, and the price difference between cameras like the GH4 and GH5 is significant in his area. So, I'll be showing how I handle handheld shooting with my Fujifilm XT3 using minimal accessories.
Challenges with a 50mm Lens
A 50mm lens has a medium telephoto focal length and a shallow depth of field, which makes it prone to shaky footage when shooting handheld. Here’s how you can stabilize your shots without a stabilizer:
1. Use Your Body as a Stabilizer
Think of your body as a stabilizer and shock absorber. Hold the camera close to your body with loose elbows and a slight bend in your knees. The more points of contact between your camera and your body, the more stable the footage will be.
2. Leverage Your Camera Strap
The camera strap can add stability. Use the strap around your neck or arm, pulling it taut to create a stable shooting setup. This works well for holding your camera at a comfortable distance without straining your arms.
3. Intentional Movement
Keep your movements slow and deliberate. Whether you’re panning, tilting, or orbiting around a subject, controlled movement makes your footage look smoother and more natural.
4. Use Your Environment
Lean against stationary objects like walls or railings to support your body and reduce camera shake. This helps a lot, especially during longer handheld shots.
5. Warp Stabilizer in Post
Warp stabilization can help clean up shaky footage in post-production. But use it sparingly—overdoing it can lead to unnatural effects like the “jello” effect. If you must use it, shoot at a high frame rate for smoother results and apply stabilization to specific parts of the clip.
Bonus Tip: Consider a Monopod
A simple, inexpensive monopod can provide extra stability and reduce strain during longer shoots. It also allows for high-angle shots and adds flexibility without the bulk of a tripod.
In summary, bend your elbows and knees, use your strap, move with intention, take advantage of your environment, and save warp stabilization as a last resort. With these techniques, you’ll have stable, professional-looking footage without needing expensive stabilization gear.
Thanks for reading, and catch you in the next one!

How To Become A Professional Photographer and Videographer
Discover what it truly takes to become a successful professional photographer or videographer. Learn why relationships and soft skills matter more than the latest gear. Explore tips on building client trust, handling business challenges, and maintaining passion through personal projects. Get insights on social media strategies, community building, and continuous growth in the competitive world of visual content creation.
My Journey as a Professional Photographer and Videographer: It's More Than Just Gear
As a small-time production artist, I've learned that becoming a successful professional photographer or videographer goes far beyond having the latest and greatest equipment. Here's what I've discovered on my journey:
Key Points from My Experience:
Relationships Matter More Than Gear
My success has hinged more on who's in my contact list than what's in my camera bag.
Building trust and relationships with clients has been crucial for my long-term success.
My Experience with SBD Apparel
My work with SBD Apparel came from relationships I built in the amateur strongman community.
The trust I earned led to significant opportunities, like shooting World's Strongest Man 2021.
Adapting to Challenges
I faced overheating issues during World's Strongest Man 2021.
This experience taught me the importance of investing in reliable gear (like the Canon R5C) to avoid such issues.
The Importance of Soft Skills
I've learned to make subjects feel seen, appreciated, and understood.
Navigating discussions and delivering great content, even when clients don't initially see the vision, has been crucial.
My Approach to Marketing and Social Media
How I market myself and engage with my audience has become a significant part of my job.
I'm aware that potential clients observe my online presence and interactions.
Handling Business Challenges
I've learned to discuss price increases with long-term clients tactfully and with advance notice.
Being solution-oriented when unexpected issues arise has set me apart.
My Personal vs. Professional Social Media Approach
I've chosen to merge my personal and professional presence online.
This approach has risks and benefits, including potential conflicts with brands over my personal views.
Building a Community
I interact with my audience, share techniques, and avoid gatekeeping.
I see myself as part of a community rather than just a service provider.
Maintaining Passion
I keep personal projects going to avoid burnout and resentment towards my craft.
My YouTube channel is currently my creative project for learning and growth.
Continuous Learning and Growth
I encourage others to learn from my mistakes and make new ones of their own.
I emphasize the importance of growing from these experiences.
Through my journey, I've found that becoming a successful professional in photography or videography requires a combination of technical skills, people skills, business acumen, and a passion for the craft that extends beyond just making money.

Adapting Canon FD Lenses To Fujifilm Cameras (With A Speedbooster)
In my latest exploration, I took the Canon FD 20-35mm f/3.5L lens, a vintage gem, and mounted it onto my Fujifilm XT3 using a Metabones Speed Booster. This setup brings out the nostalgic charm of vintage lenses while making them more versatile on modern mirrorless cameras.
The appeal of these old lenses lies in their character, which offers a unique, timeless look that newer lenses often lack. While they may not match the sharpness and autofocus capabilities of today’s technology, the Canon FD lenses deliver a distinctive aesthetic that many photographers find appealing, especially in a world where the cost of new equipment continues to rise.
Throughout my photo walk, I explored various scenes, from tall grass to urban settings in my hometown, capturing images that evoke memories with their film-like rendering. The Speed Booster not only enhances the lens’s performance by providing a wider field of view and an additional stop of light but also adds a layer of convenience for those who want to breathe new life into their old glass.
While there are some challenges, such as the lack of weather sealing and manual focus, the experience of using these lenses is rewarding. Whether you’re looking to save money or simply want to experiment with vintage gear, adapting Canon FD lenses to the Fujifilm XT3 with a Speed Booster is a satisfying way to achieve a classic photographic look.
If you’re interested in exploring this setup, I highly recommend giving it a try. And as always, feel free to leave any questions or suggestions for future videos in the comments. Catch you at the next one!
In my latest exploration, I took the Canon FD 20-35mm f/3.5L lens, a vintage gem, and mounted it onto my Fujifilm XT3 using a Metabones Speed Booster. This setup brings out the nostalgic charm of vintage lenses while making them more versatile on modern mirrorless cameras.
The appeal of these old lenses lies in their character, which offers a unique, timeless look that newer lenses often lack. While they may not match the sharpness and autofocus capabilities of today’s technology, the Canon FD lenses deliver a distinctive aesthetic that many photographers find appealing, especially in a world where the cost of new equipment continues to rise.
Throughout my photo walk, I explored various scenes, from tall grass to urban settings in my hometown, capturing images that evoke memories with their film-like rendering. The Speed Booster not only enhances the lens’s performance by providing a wider field of view and an additional stop of light but also adds a layer of convenience for those who want to breathe new life into their old glass.
While there are some challenges, such as the lack of weather sealing and manual focus, the experience of using these lenses is rewarding. Whether you’re looking to save money or simply want to experiment with vintage gear, adapting Canon FD lenses to the Fujifilm XT3 with a Speed Booster is a satisfying way to achieve a classic photographic look.
If you’re interested in exploring this setup, I highly recommend giving it a try. And as always, feel free to leave any questions or suggestions for future videos in the comments. Catch you at the next one!

The Fujifilm 200mm F2 in 2024
In my latest video, I revisited one of my favorite lenses, the Fujifilm 200mm F2, which I’ve owned for nearly five years. Originally designed for sports photography, this lens offers incredible subject magnification and background compression, making it surprisingly effective for portrait work. I took it out for some portrait sessions, and the results were stunning. The 200mm F2, especially when paired with a 1.4x teleconverter, transforms everyday scenes into dramatic, high-impact images that are usually reserved for professional sports photography.
Despite its weight and size, this lens is a joy to use, delivering crisp, detailed photos even in challenging lighting conditions. If you're interested in seeing how this lens performs outside of its usual sports environment, check out the video for a detailed look at its capabilities in portrait photography. As always, feel free to leave your thoughts and suggestions in the comments.
In my latest video, I revisited one of my favorite lenses, the Fujifilm 200mm F2, which I’ve owned for nearly five years. Originally designed for sports photography, this lens offers incredible subject magnification and background compression, making it surprisingly effective for portrait work. I took it out for some portrait sessions, and the results were stunning. The 200mm F2, especially when paired with a 1.4x teleconverter, transforms everyday scenes into dramatic, high-impact images that are usually reserved for professional sports photography.
Despite its weight and size, this lens is a joy to use, delivering crisp, detailed photos even in challenging lighting conditions. If you're interested in seeing how this lens performs outside of its usual sports environment, check out the video for a detailed look at its capabilities in portrait photography. As always, feel free to leave your thoughts and suggestions in the comments.

Fujifilm X-T5 and 50mm F1 Natural Light Photoshoot
In my latest video, I dive into a portrait photoshoot using the Fujifilm X-T5 paired with the 50mm F1 lens—one of my all-time favorite setups. I’ve always appreciated the versatility of this lens, especially its ability to create stunning portraits with a slightly wider view than the typical 85mm.
During the shoot, I experimented with both natural and off-camera flash lighting, highlighting the importance of understanding your gear and the environment. This session reminded me that while modern technology is fantastic, sometimes it's refreshing to return to the basics, relying more on ambient light and less on additional equipment.
I also touched on the importance of adaptability during a shoot, especially when dealing with challenging lighting conditions. Whether you're a seasoned professional or just starting out, this video showcases how a well-chosen lens can elevate your photography, making every shot count.
If you're interested in seeing the results and learning more about my process, check out the video linked above. And as always, feel free to leave your thoughts and suggestions in the comments.
In my latest video, I dive into a portrait photoshoot using the Fujifilm X-T5 paired with the 50mm F1 lens—one of my all-time favorite setups. I’ve always appreciated the versatility of this lens, especially its ability to create stunning portraits with a slightly wider view than the typical 85mm.
During the shoot, I experimented with both natural and off-camera flash lighting, highlighting the importance of understanding your gear and the environment. This session reminded me that while modern technology is fantastic, sometimes it's refreshing to return to the basics, relying more on ambient light and less on additional equipment.
I also touched on the importance of adaptability during a shoot, especially when dealing with challenging lighting conditions. Whether you're a seasoned professional or just starting out, this video showcases how a well-chosen lens can elevate your photography, making every shot count.
If you're interested in seeing the results and learning more about my process, check out the video linked above. And as always, feel free to leave your thoughts and suggestions in the comments.

13mm Wide Angle Setup For Your Z-V1 II
If you’re using the Sony ZV-1 Mark II and looking to expand its field of view for your vlogs or desk setups, this guide is for you. The standard field of view can feel restrictive, especially for those who need to capture more in tight spaces. By adding a Ulanzi wide-angle lens and pairing it with the C TV bracket, you can achieve a dramatic 13mm focal length, offering an expansive view perfect for YouTube content creation.
This setup is particularly beneficial for those who want to maintain a compact, portable configuration while getting that extra wide-angle perspective. Whether you're showcasing products, creating tutorials, or just looking for a more engaging shot, this combination gives you the flexibility and professional touch you need.
One thing to note is the slight curvature introduced by the wide-angle lens, but this can be corrected with lens correction in post-production. The result? A super-wide, immersive field of view that rivals more expensive setups, all from your desk.
In conclusion, this 13mm wide-angle setup for the ZV-1 Mark II offers a simple yet powerful way to enhance your video production. It’s a game-changer for content creators who want a broader perspective without sacrificing portability. If you're looking for a nerdy, effective way to upgrade your ZV-1 Mark II, this is the setup for you. Catch you in the next video!
If you’re using the Sony ZV-1 Mark II and looking to expand its field of view for your vlogs or desk setups, this guide is for you. The standard field of view can feel restrictive, especially for those who need to capture more in tight spaces. By adding a Ulanzi wide-angle lens and pairing it with the C TV bracket, you can achieve a dramatic 13mm focal length, offering an expansive view perfect for YouTube content creation.
This setup is particularly beneficial for those who want to maintain a compact, portable configuration while getting that extra wide-angle perspective. Whether you're showcasing products, creating tutorials, or just looking for a more engaging shot, this combination gives you the flexibility and professional touch you need.
One thing to note is the slight curvature introduced by the wide-angle lens, but this can be corrected with lens correction in post-production. The result? A super-wide, immersive field of view that rivals more expensive setups, all from your desk.
In conclusion, this 13mm wide-angle setup for the ZV-1 Mark II offers a simple yet powerful way to enhance your video production. It’s a game-changer for content creators who want a broader perspective without sacrificing portability. If you're looking for a nerdy, effective way to upgrade your ZV-1 Mark II, this is the setup for you. Catch you in the next video!

Upgrade Your Phone Videos: Five Essentials For Pro Results
In this video, I demonstrate how to elevate your phone video quality with five essential tools. First, focus on audio quality by using a reliable lavalier mic like the Sennheiser XS USB-C. Next, improve your lighting with a compact, portable light such as the Aputure MC. Use a magnetic selfie screen to easily frame shots with your phone's rear camera. Invest in a sturdy tabletop tripod for stable, eye-level shots. Lastly, leverage the Blackmagic Camera app for pro-level features like manual controls and aspect ratio framing.
These tools make your content look and sound more professional without breaking the bank. If you’re serious about improving your videos, these are must-haves in your toolkit.
**Blog Post: Upgrade Your Phone Videos with These 5 Essentials**
Are you ready to take your phone videos from average to professional? In this guide, I explore five essential tools to enhance your video quality, making it easy to produce content that stands out.
1. **Audio Quality Matters**: Start with clear, crisp audio by using a lavalier mic like the Sennheiser XS USB-C. Poor audio is more distracting than subpar visuals, so prioritize sound.
2. **Lighting Is Key**: A compact, portable light such as the Aputure MC can make a significant difference. Good lighting eliminates harsh shadows and ensures your face is evenly lit, which is crucial for a polished look.
3. **Frame with Precision**: Using your phone's rear camera offers better quality, but framing can be tricky. Enter the **magnetic selfie screen**—this tool allows you to see exactly what you’re filming, making it easier to capture the perfect shot.
4. **Stable Shots with a Tabletop Tripod**: A sturdy tabletop tripod, like the iFootage, ensures your shots are stable and at the right height. It’s an essential tool for any desk setup, making it easy to record without the hassle of a full-sized tripod.
5. **Unlock Pro Features with the Blackmagic Camera App**: This free app offers advanced features like manual controls and aspect ratio framing, typically found only in high-end cameras. It's a game-changer for those who want to step up their production quality without investing in expensive equipment.
These tools are designed to simplify the process of creating professional-looking videos with just your phone. Whether you’re a content creator, a small business owner, or just someone looking to improve their video quality, these essentials will help you achieve impressive results.
If you have any questions or want to see more in-depth tutorials on mobile video production, leave a comment, and I’ll be happy to explore those topics in future videos. Until then, happy shooting!

Taking The Canon 24-105mm F2.8L For A Spin: A Real World Test
Blog Post: The Evolution of Gear Reviews and the Canon 24-105mm f/2.8L
In a landscape saturated with gear reviews, it's easy to lose sight of why many of us started creating content. Initially, gear videos weren't the goal; they became a necessity after navigating countless purchases and the dream of turning a passion into a profession. This context sets the stage for my review of the Canon 24-105mm f/2.8L, a lens that breaks away from the monotony of gear talk because it genuinely solves long-standing problems for professionals.
For years, the Canon 24-105mm focal length has been synonymous with versatility, but it often left photographers and videographers wanting more, especially in low light. The original f/4 version, while functional, lacked the light-gathering capability needed for more challenging environments. Fast forward to today, Canon has redefined this focal range with the 24-105mm f/2.8L, a lens that finally offers the best of both worlds—versatility and light performance.
What sets this lens apart? It’s not just the extra stop of light, but how it impacts the workflow of professionals. For event photographers and videographers, this lens minimizes the need to constantly switch between lenses, streamlining the process and allowing for greater focus on capturing the moment. Whether you're double-slinging cameras at a wedding or covering dynamic sports events like Strongman competitions, this lens adapts effortlessly.
For photographers, the lens addresses the long-standing issue of focal length overlap in the classic trinity setup (24-70mm, 70-200mm). The 24-105mm fills this gap, making it possible to cover a broader range without the need for multiple lenses. This efficiency is particularly valuable in tight quarters, where swapping lenses can be cumbersome and time-consuming.
For videographers, the 24-105mm f/2.8L is a game-changer. Its versatility allows for seamless transitions between wide and medium telephoto shots, even in challenging shooting conditions. When paired with a high-resolution camera like the Canon R5C, the lens can effectively cover an even broader range with digital cropping, making it an indispensable tool for event coverage.
Despite its larger size and weight compared to the 24-70mm, the benefits far outweigh these minor inconveniences. The lens’s construction is a testament to Canon’s commitment to pushing the boundaries of what's possible, offering a lens that meets the needs of both photographers and videographers without compromise.
In conclusion, the Canon 24-105mm f/2.8L is more than just an incremental upgrade; it's a lens that could very well redefine the standard kit for professionals. Whether you’re a seasoned photographer, a budding videographer, or somewhere in between, this lens offers a compelling reason to reconsider your go-to gear setup. As we move into an era where AI and innovative lens designs are becoming the norm, Canon is leading the charge with tools like this that genuinely enhance the creative process.
**Blog Post: The Evolution of Gear Reviews and the Canon 24-105mm f/2.8L**
In a landscape saturated with gear reviews, it's easy to lose sight of why many of us started creating content. Initially, gear videos weren't the goal; they became a necessity after navigating countless purchases and the dream of turning a passion into a profession. This context sets the stage for my review of the Canon 24-105mm f/2.8L, a lens that breaks away from the monotony of gear talk because it genuinely solves long-standing problems for professionals.
For years, the Canon 24-105mm focal length has been synonymous with versatility, but it often left photographers and videographers wanting more, especially in low light. The original f/4 version, while functional, lacked the light-gathering capability needed for more challenging environments. Fast forward to today, Canon has redefined this focal range with the 24-105mm f/2.8L, a lens that finally offers the best of both worlds—versatility and light performance.
What sets this lens apart? It’s not just the extra stop of light, but how it impacts the workflow of professionals. For event photographers and videographers, this lens minimizes the need to constantly switch between lenses, streamlining the process and allowing for greater focus on capturing the moment. Whether you're double-slinging cameras at a wedding or covering dynamic sports events like Strongman competitions, this lens adapts effortlessly.
For photographers, the lens addresses the long-standing issue of focal length overlap in the classic trinity setup (24-70mm, 70-200mm). The 24-105mm fills this gap, making it possible to cover a broader range without the need for multiple lenses. This efficiency is particularly valuable in tight quarters, where swapping lenses can be cumbersome and time-consuming.
For videographers, the 24-105mm f/2.8L is a game-changer. Its versatility allows for seamless transitions between wide and medium telephoto shots, even in challenging shooting conditions. When paired with a high-resolution camera like the Canon R5C, the lens can effectively cover an even broader range with digital cropping, making it an indispensable tool for event coverage.
Despite its larger size and weight compared to the 24-70mm, the benefits far outweigh these minor inconveniences. The lens’s construction is a testament to Canon’s commitment to pushing the boundaries of what's possible, offering a lens that meets the needs of both photographers and videographers without compromise.
In conclusion, the Canon 24-105mm f/2.8L is more than just an incremental upgrade; it's a lens that could very well redefine the standard kit for professionals. Whether you’re a seasoned photographer, a budding videographer, or somewhere in between, this lens offers a compelling reason to reconsider your go-to gear setup. As we move into an era where AI and innovative lens designs are becoming the norm, Canon is leading the charge with tools like this that genuinely enhance the creative process.

My Favorite Fujifilm Portrait Combo
The Fujifilm X-T5 and 50mm F1 are my favorite camera/lens combo to date. In this video I do a Cherry Blossom photoshoot using this combo and go over its strengths, weaknesses, and compare it to other setups.
This was my last photoshoot before moving out of the Washington, D.C. region with long-time friend and model Rebecca Chen. Fittingly, we shot with my favorite camera/lens combo, the Fujifilm X-T5 and the Fujifilm 50mm F1 when the Cherry Blossoms were in bloom.
In this video I go over the reasons why I love this combo, what the limitations are, and show you an entire photoshoot in the process while I yap my way through.